"International flights seem much more complicated than domestic flights..."
"What exactly do I need to do for check-in?"
If you're feeling overwhelmed, don't worry. The ANA international boarding process is actually quite simple once you understand the steps.
However, unlike domestic flights, international travel involves stricter procedures, and missing an important step could prevent you from boarding.
In this guide, we'll walk you through everything from online check-in to the entire airport process, so even first-time international travelers can fly with confidence.
✈️ Compare the Lowest Airfares for ANA, JAL & LCCs in One Place
Even if you're booking close to departure, you can still save.
The exact same flight can differ in price by hundreds of dollars depending on when you book.
No registration required. Comparing prices is completely free.
Skyscanner displays the total price, including taxes and fees, so there are no surprises.
This Guide Is Perfect For
- First-time international travelers
- Anyone unfamiliar with the ANA international boarding process
- Travelers who want to learn how online check-in works
- Anyone wondering how early to arrive at the airport
- Anyone who wants to avoid missing their flight
International Flight Pre-Departure Checklist: What to Do & What to Bring
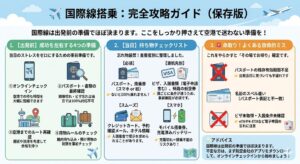
A smooth international trip starts long before you arrive at the airport.
If you prepare everything in advance, navigating the airport on departure day will be much easier and far less stressful.
4 Things to Do Before Your Flight
- 1. Complete Online Check-in
Save time at the airport by checking in before you arrive. - 2. Verify Your Passport & Travel Documents
An expired passport or missing visa usually cannot be fixed on the day of departure. - 3. Plan Your Route to the Airport
Allow extra time for traffic, train delays, or other unexpected disruptions. - 4. Review Your Baggage Allowance
Check your carry-on and checked baggage rules before you leave.
Taking care of these four items in advance will make your departure day much smoother and far less stressful.
Departure Day Checklist
Must-Have Items (You Cannot Board Without These)
- Passport
- Boarding pass (mobile or printed)
※ Without these two items, you will not be allowed to board.
Required Depending on Your Destination
- Visa (if required)
- Entry documents or electronic travel authorization
- Proof of onward or return travel (required by some countries)
*Entry requirements vary by country, so always verify them before your trip.
Helpful Items to Have Ready
- Credit card
- Booking confirmation email
- Hotel reservation details
👉 Immigration officers may ask to see these documents upon arrival.
Smartphone Essentials (Often Overlooked)
- Mobile boarding pass
- A fully charged phone or portable battery
If your phone battery dies, you may not be able to access your boarding pass.
Common Mistakes That Can Prevent You from Boarding
- An expired passport
- A name mismatch between your passport and airline ticket
- Missing a required visa or failing to meet entry requirements
Discovering any of these problems on your departure day is usually too late.
A Real Lesson from Our Editor: A Simple Name Mistake That Could Cost You Over $1,000

One of the most expensive mistakes you can make when booking an international flight is a simple typo—reversing your first and last name.
Depending on the airline and fare conditions, correcting this mistake could cost you more than $1,000 if a new ticket is required.
- Given Name / First Name = Your first name
- Surname / Last Name = Your family name
Before completing your booking, make sure the name on your ticket matches your passport exactly.
When I realized my mistake after booking, my heart sank.
I had accidentally entered my first and last names in the wrong order.
Why Is This Mistake So Serious?
For international flights, the name on your airline ticket must match your passport exactly.
Even a minor mismatch may cause the airline to treat you as a different passenger.
In addition, many airline reservation systems do not allow passenger names to be changed once a ticket has been issued.
One Phone Call Saved Me Thousands
Fortunately, I noticed the mistake before departure and contacted the airline immediately. They corrected my booking at no additional charge.
Later, while checking in at the airport, I mentioned the incident to an airline staff member. They told me something I still remember:
"Some passengers don't notice the mistake until they arrive at the airport. In some cases, they have to buy a brand-new ticket costing over $1,000."
That was a powerful reminder of how costly such a simple mistake can be.
Policies vary by airline, so if you notice any name error, contact the airline immediately.
Lesson Learned: Check Your Name as Soon as You Receive Your Booking Confirmation
- Surname / Last Name = Family name
- Given Name / First Name = First name
Verify that your name appears exactly as it does in your passport. Discovering a mistake at the airport could turn your budget trip into a very expensive one.
⚠️ Avoid Costly International Flight Booking Mistakes
Airfare prices change constantly. Before completing your booking, double-check your
name, passport details, visa requirements, and travel documents.
A final check before you book can help you avoid costly reissue fees and unexpected airfare increases.
How ANA International Flights Differ from Domestic Flights
ANA international flights involve more procedures and stricter time requirements than domestic flights.
Many first-time international travelers are surprised by these differences, so it's important to understand them before your trip.
Knowing what to expect in advance will help you avoid unnecessary stress on departure day.
The Biggest Difference: Additional Departure Procedures
Unlike domestic flights, international departures require you to complete departure immigration (passport control).
- Present your passport
- Complete facial recognition or passport inspection, depending on the airport
Because of these additional procedures, you'll need to allow more time before your flight.
Required Documents: Domestic vs. International
Domestic Flights
- Boarding pass (a mobile boarding pass is accepted)
International Flights
- Passport (required)
- Visa (if required for your destination)
- Additional travel documents (depending on your destination)
👉 If you forget your passport, you will not be allowed to board.
Arrival Time & Time Requirements
Domestic Flights
- Pass through the security checkpoint at least 20 minutes before departure.
International Flights
The recommended timeline will be explained in detail later in this guide.
International flights have much stricter time requirements, so it's essential to arrive at the airport with plenty of time to spare.
The recommended airport arrival time is also very different:
- Domestic flights: About 1 hour before departure
- International flights: About 2–3 hours before departure
👉 International flights will not wait for late passengers.
How Early Should You Arrive at the Airport? (This Is All You Need to Know)
👉 If you remember these key times, you'll be well prepared.
- Arrive at the airport: 2–3 hours before departure
- Complete check-in: No later than 60 minutes before departure
- Drop off checked baggage: No later than 60 minutes before departure
- Arrive at the boarding gate: No later than 30 minutes before departure
Missing any of these deadlines could prevent you from boarding your flight.
👉 If it's your first international flight, arriving 3 hours before departure is the safest option.
Recommended Hotel for Early Morning or Late-Night Flights
ANA operates many early-morning departures and late-night arrivals from Haneda Airport.
Staying at a hotel the night before—or after—your flight can make your trip much more comfortable by reducing travel stress and giving you extra time before departure or after arrival.
If you're traveling from outside Tokyo, it's a good idea to book an airport hotel in advance.
Here is one of the highest-rated hotels with convenient access to Haneda Airport.

Toyoko Inn Haneda Airport No.1
Looking for a convenient place to stay near Haneda Airport? This is one of the best choices. In addition to its excellent location near the station, the hotel offers a free airport shuttle service starting as early as 3:00 a.m. It's an excellent choice for travelers with early-morning departures or late-night arrivals, offering outstanding value for money.
ANA International Flight Check-In Process: Complete Step-by-Step Guide
The ANA international boarding process is straightforward once you understand the steps.
- ① Check in (online or at the airport)
- ② Check your baggage (if applicable)
- ③ Go through security screening and immigration
- ④ Proceed to your boarding gate
👉 Once you understand these four steps, navigating the airport becomes easy.
STEP 1: Check In (Online Check-In Recommended)
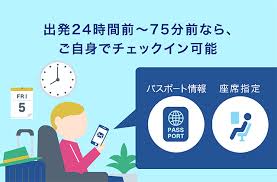
The easiest and most convenient option is online check-in.
By checking in on your smartphone or computer before arriving at the airport, you can significantly reduce your waiting time.
- Available from 24 hours until 75 minutes before departure
- Enter your passport information, select your seat, and provide any required travel information
👉 After completing online check-in, you'll receive your boarding pass (QR code).
Benefits
- Skip long check-in lines at the airport
- Spend less time completing airport procedures
- Convenient even for first-time international travelers
Please note
- You may still need to visit the check-in counter if your travel documents require verification.
- Online check-in may not be available for passengers traveling with infants or on certain routes.
👉 Online check-in does not always mean you can completely skip the check-in counter.
STEP 2: Check In at the Airport (If Required)
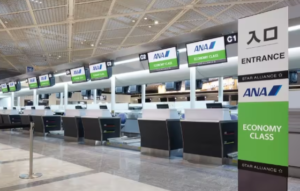
If you don't use online check-in, you'll need to complete the process at the airport.
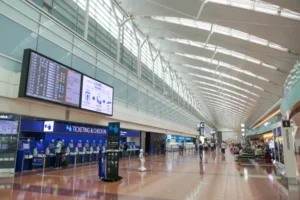
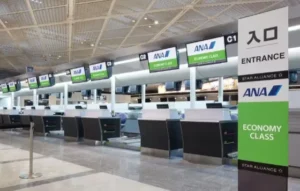
- Use a self-service check-in kiosk or a staffed check-in counter
- Deadline: 60 minutes before departure
- Bring your passport and reservation number (or e-ticket number)
STEP 3: Check Your Baggage
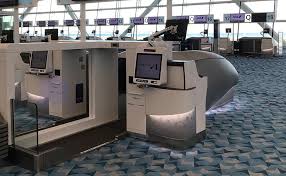
If you have checked baggage, such as a suitcase, you'll need to drop it off here.
- Deadline: 60 minutes before departure
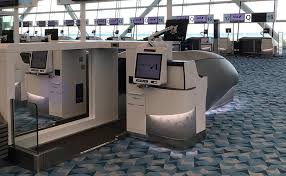
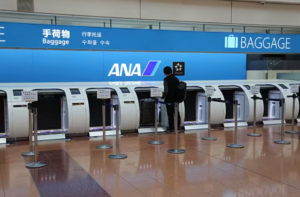
- Use the self-service baggage drop (recommended) or the staffed baggage counter
Important reminders
- Dangerous goods are prohibited in checked baggage.
- Keep valuables and important documents in your carry-on baggage.
STEP 4: Security Screening & Immigration
This is the most important part of the international departure process.
- Security screening: X-ray screening of your carry-on baggage and walkthrough metal detector
- Immigration: Present your passport, followed by facial recognition or passport inspection, depending on the airport
👉 Security screening and immigration can become very busy, so allow plenty of extra time.
Be sure to follow the recommended arrival times explained in the previous section.
Common Mistakes That Can Cause You to Miss Your Flight
Almost all missed international flights happen for one of these two reasons:
- Not allowing enough time (arriving late or taking too long to complete airport procedures)
- Missing or incorrect travel documents (passport, visa, or entry requirements)
Typical examples
- Arriving at the airport too late and missing the check-in deadline
- Being stopped at the counter because of incomplete travel documents
- Long security lines causing you to arrive late at the boarding gate
- A boarding gate located far away, requiring more walking time than expected
As long as you manage your time well and have all your required travel documents ready, you'll almost certainly board your flight without any problems.
👉 In reality, almost everyone who misses an international flight does so because of one of these two issues.
Still Not Sure? Here's When to Arrive
- Normal travel periods: 2 hours before departure
- First-time international travelers: 3 hours before departure
- Peak travel seasons: More than 3 hours before departure
👉 For international flights, arriving earlier than necessary is always better than arriving too late.
Frequently Asked Questions (FAQ)
How early do I need to check in?
For ANA international flights, complete check-in at least 60 minutes before departure. Check-in deadlines may vary at some airports, so always confirm the requirements for your departure airport.
Can I board with online check-in only?
Usually, yes. However, you may still need to visit the check-in counter if your passport or other travel documents require verification.
Can I board using only my smartphone?
Yes. At most airports, you can board using a mobile boarding pass on your smartphone.
Note: Some airports or destinations may still require a printed boarding pass, so check ANA's instructions before departure.
What happens during immigration?
After passing through security screening, you'll proceed to immigration, where your passport will be checked before you enter the international departure area. For most Japanese passport holders, the process is quick and straightforward.
When should I line up for security screening?
It's recommended to enter the security checkpoint at least 1 hour before departure, especially during busy travel periods.
What happens if I arrive late at the airport?
If you miss the check-in deadline or arrive at the boarding gate after it closes, you may not be allowed to board your flight. Always arrive at the airport well in advance, especially during holidays and peak travel seasons.
Do I need to print my boarding pass?
In most cases, a mobile boarding pass is sufficient. However, some airports or destinations may require a printed boarding pass, so check ANA's instructions before departure.
Do I need my passport for domestic flights?
No. A passport is required only for international flights. For domestic flights within Japan, another valid form of identification may be accepted if identification is required.
Can I check in baggage after online check-in?
Yes. Even if you've already completed online check-in, you can still drop off your checked baggage at the baggage counter or self-service baggage drop before proceeding to security.
How early should I arrive at the boarding gate?
ANA recommends arriving at the boarding gate at least 30 minutes before departure. Boarding usually begins 20–30 minutes before the scheduled departure time.
Can I bring liquids in my carry-on baggage?
Yes. For international flights, liquids must be in containers of 100 ml (3.4 oz) or less and placed in a single transparent, resealable plastic bag, in accordance with international security regulations.
Recommended Hotels for ANA International Sale Travelers (Tokyo & Kyoto)
If you're planning a trip to Japan with a ANA International sale fare, it's a good idea to book your hotel as soon as you secure your flight.
During peak travel seasons such as cherry blossom season, autumn foliage, Golden Week, and the New Year holidays, hotel rates can rise quickly. Booking early gives you more choices and better prices.
Below are two highly recommended hotels in Tokyo and Kyoto that offer convenient locations and excellent access for travelers visiting Japan.

Just a 1-Minute Walk from JR Ikebukuro Station
Hotel Metropolitan
Just a one-minute walk from JR Ikebukuro Station, Hotel Metropolitan Ikebukuro offers easy access to major attractions across Tokyo as well as convenient transportation to Narita Airport. It's an excellent base for shopping, sightseeing, and first-time visitors to Japan.

Just a 2-Minute Walk from Kyoto Station – Perfect Base for Exploring Kyoto
Hotel Vischio Kyoto by GRANVIA
Just a two-minute walk from Kyoto Station, Hotel Vischio Kyoto by GRANVIA offers excellent access to Kyoto's most popular attractions. Operated by JR West Hotels, it combines modern comfort, reliable service, and a convenient location, making it an ideal base for exploring Kyoto.

Top Picks in Tokyo, Osaka, Kyoto, Hokkaido & Okinawa
25 Best Hotels in Japan
We’ve selected 25 recommended hotels across Tokyo, Osaka, Kyoto, Hokkaido, and Okinawa. Each hotel was chosen based on accessibility, sightseeing convenience, and how well it suits different travel styles.
💳 My Overseas ATM Experience: When My Card Was Declined Abroad
After arriving at Don Mueang International Airport in Thailand, I had an unexpected problem: my credit cards were repeatedly declined at ATMs, and I was unable to withdraw cash.
This situation can be especially stressful when traveling with LCCs (low-cost carriers), as many budget airlines operate late-night flights. Arriving at your destination without access to cash can quickly become a major issue.
Eventually, Revolut was the only card that worked immediately. My experience showed that overseas ATM availability can vary significantly depending on the card provider and payment network.
▶ Read my real experience of a card being declined at an overseas ATM
Stay Connected in Japan with a Reliable eSIM
Once you've learned how to check in and board your flight, don't forget to prepare your internet connection before traveling to Japan.
A travel eSIM lets you get online as soon as you arrive—no SIM card swaps or pocket Wi-Fi rental required. With mobile data ready on your smartphone, you can easily use Google Maps, book train tickets, contact your hotel, and stay in touch with family and friends throughout your trip.
Set up your eSIM before departure so you can start exploring Japan the moment you land.
🥇 Holafly
Most Popular ★★★★★
[Unlimited Data] Get 5% OFF Your Holafly Unlimited Japan eSIM
🥈 Ubigi
Best Value
[Prepaid Plans] Book Your Ubigi eSIM Plan at a Discounted Rate
🥉 Airalo
Short-Term Trips
📱 Mobal Voice + Data eSIM
Japanese Phone Number
[Japanese Phone Number] Get a Mobal Voice + Data eSIM
\ Never Miss Flight Sales and the Latest Cheap Fare Deals! /
The latest flight sale updates from JAL, ANA, and LCC airlines are also shared daily in real time on our social media channels.
※Receive the latest travel updates, including limited-time flight deals and upcoming sale predictions.
Conclusion: For ANA International Flights, Timing and Travel Documents Are Everything
✈️ Compare the Lowest Fares for ANA, JAL & LCCs in One Search
Airfares change in real time. Booking at today's lowest fare could save you
tens of thousands of yen on a round-trip ticket.
*Airfares change constantly, so today's lowest price may not be available later.*
*No registration required. Compare prices for free with no booking fees.*
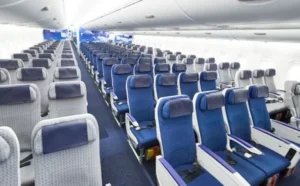
Although flying internationally with ANA may seem complicated, the process is actually quite straightforward.
- Check in
- Drop off your checked baggage
- Go through security screening
- Go through immigration
- Board your flight
The two most important things to remember are:
👉 Always complete check-in at least 60 minutes before departure and be at your boarding gate at least 30 minutes before departure.
If you follow these two rules, you'll almost certainly board your flight without any problems.
Final Tips for First-Time International Travelers
- Arrive at the airport 3 hours before departure.
- Double-check your passport and travel documents before leaving home.
- Take advantage of online check-in whenever possible.
👉 Keep these tips in mind, and you'll be ready to enjoy a smooth and stress-free journey.